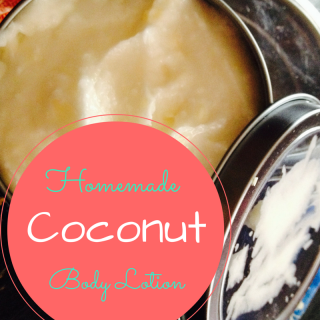
If you remember, I one of my commitments for the New Year was to live simpler and make more of my own products. I was already making my own Laundry Soap, and I recently starting making Stache Shine & Hair … Continue reading
If you remember, I one of my commitments for the New Year was to live simpler and make more of my own products. I was already making my own Laundry Soap, and I recently starting making Stache Shine & Hair … Continue reading
Need a last minute Fun and Frugal Valentine Gift? Valentine’s Day is so hard for me because there is only so many balloons and boxes of candy you can give and receive. Since I am a canner, I always … Continue reading

I love Christmas. I love celebrating the Reason of the Christmas Season, The Birth of Christ. So when I do my Christmas decorating, I like to keep the simplicity of the season. Which fits perfectly with my early farmhouse/primitive decor. One … Continue reading

Tweet #wakeupwednesdaylinky Welcome to the 38th week of Wake Up Wednesday “Linky” 25 Blogs – 1 Party & Giveaway We are so excited to have you all party with us. Thank you so much to all those who … Continue reading

I love parties!
I love planning parties, decorating for parties, and hosting parties.
During the year, we don’t buy our kiddos a lot of extra except what they need, such as new shoes, clothes, items for an activity and ect. So when their birthdays come around, I always want to make them special. I will just say for the record, that yes I sometimes always go overboard. It drives the husby crazy!
But I also like to host birthday parties for family and friends as well. And when I plan birthdays for them I have to stick to a budget. I will say it’s not always easy.
My two great nieces turned four and five a few weeks back. they came to stay with us for a few days the week of their birthdays, which happens to be two days apart from each other, and I wanted to make it special for them.
Since I have been tutoring this summer, I happened to have two of the kiddos at my house that day, whom my nieces know from church. I thought wouldn’t it be fun to throw them a small birthday party! Of course my mind started spinning as I got to planning. Even though I wanted to make it special, I also needed to keep it small, in the budget and on a time schedule.
My daughter Lindy started looking for leftover party supplies I keep stashed around the house while I started on cakepops. I prefer making cakepops for small parties. They are fast, easy and so much fun. I make my cake and icing homemade and I had white chocolate and sprinkles on hand from all the baking I do so I was out no expense.

Lindy found green and yellow streamers that a friend had gave to me, that I thought would make a great background. Next we found a roll of leftover pink tablecloth from a church fundraiser last year. I also found a teal tablecloth that was leftover from Lindy’s birthday last month, that we used for a table runner.

It was starting to come together and so far I hadn’t spent anything.
I realized that we didn’t have plates, forks and napkins so I ran to the store to pick those up and found the cute yellow striped straws for .50. I left the store with my supplies and only spent $4.00 plus tax. When I got back home I placed the forks in a cute pink bucket, finished the cake pops and decided on strawberry lemonade to drink. I mixed together half a package of sugar-free lemonade koolaid and 1/2 pack of sugar-free strawberry koolaid, added a lemon slice on the side and “voila” we had party punch.

Instead of using party cups, I used these cute plasic hug juice containers that I save and reuse. they were perfect with the yellow striped straws.

At Lindys party, we had photo props, so I pulled those out, put them in a cute bucket, added a couple frames that I had picked up at a thrift store several months back and hadn’t used and we had a really cute photo booth.


I used a couple cute colored bowls for goldfish and gumballs, also left from Lindy’s party.
I placed the cakepops on a cake stand and we were almost ready.

The last thing we needed was party hats. I found a few pieces of leftover scrapbook paper that I had used for a craft and elastic string I had bought for another project I am working on, and we made these cute, tall party hats.

The kiddos love them!

Meet Jessie! Look at that sweet face!
It was fast, threw together all before 1 pm. It was cheap, spent appx $4.50 total and it was fun!

Meet Silly Maddie!
Instead of games we let them draw with chalk on the driveway, have fun with the photo booth and watch a movie.

They had a blast. Happy Birthday Girls!
I got to thinking, I know other bloggers must have amazing party ideas as well.
So I got with some fellow blogging friends and we shared ideas.
Dawn from HomemakingHacks has an amazing post on….

Creating your own party decor will help make your party a success! The best news is that it’s probably a lot easier and less expensive than you think! With the help of basics and simple color coordination, you can make all different types of matching party goodies in under an hour.
I am so in love with the tape bunting around the jars! So adorable! And so creative!
Another idea I love comes from Katelyn from What’s Up Fagan’s

Several years ago, I decided not to just throw a birthday party for my daughter, I decided that she needed to do it with me. And not just her, the rest of her siblings needed to help too. It was a perfect way to teach them responsibility, kindness, even organization. I knew my children would have the motivation to help with such a great reward so I went to work. As they have gotten older, they help more and I do less and less.
Being a homeschool momma, I am all about my kiddos being independent and learning life skills at an early age. Love this!
And make sure to drop by and check out Crystal’s Birthday Parties on a Tight Budget from Crystal and Co.

If you’re like a lot of party-lovin’ moms, you practically drool over fabulous pictures of designer birthday celebrations with gorgeous fondant cakes that START at one hundred dollars…and then reality hits: not in the budget this time. But do you know you can host an awesome kid’s birthday party on a really tight budget? It’s possible! Read on for some of my favorite money saving suggestions.
Thanks Crystal for the Awesome Ideas!
I hope you have enjoyed all of the amazing tips to help you stay on budget for your next party.
And make sure you check out each of these amazing blogs!

I love the 4th of July!
I don’t remember exactly when I decided it was my favorite, or really why it was my favorite.
Maybe it’s the summertime and sunshine, or flag blowing in the wind. Could be just the Freedom and Fireworks with friends and family.
No matter what the reason be, I just know I love the feeling I get on the 4th!
I love to make goodies for the BBQ’s and Picnics and crafts to decorate the house.
This year we spent the 4th at friends house having a BBQ/Pool Party. I wanted to make it special for the family who invited us. I always find it a treat to be invited to holiday’s and I want sure I impress to be invited again!
For the BBQ, I chose to make Freedom Frost Spritzer, Patriotic Mini Apple Pies, and Freedom Sprinkle Sugar Cookies (Y’all, all 4th of July goodies have to be named).
The hostess was more than happy to turn over the dessert making to me, but I wanted to make sure that since it was a Pool Party, the desserts were easy to grab and eat.

First up is the Freedom Frost Spritzer.
Here is Arkansas, it is super HOT, and the humidity makes you sweat buckets after being outside for even 5 minutes. Because of that, it is super important to stay hydrated. This drink is cool and refreshing, as well as, great to help you stay replenished because it contains electrolytes.
I’ll be honest with you. I’m not a huge fan of gatorade, but adding in the lemon-lime soda and the ginger-ale, completely changes the flavor and I really love it.
Go all out if you feel like it and add whole cherries or a few strawberry slices for a more festive look.
Ingredients:
1 32 oz bottle of Frost Glacier Freeze Gatorade
1 20 oz lemon-lime drink
1 20 oz ginger-ale

How to make it:
1) Freeze your bottles of drinks until slushy (If you don’t have time to wait til they are slushy, just add ice to your drink dispenser)
2) Add your gatorade, lemon-lime drink and ginger-ale together
3) Add any fruit that you like
4) Serve
So quick and easy!

For one of the desserts I decided on Patriotic Mini Apple Pies.
I LOVE making these! They are so cute and easy. You really can’t mess them up.
So if you are frightened of your pie looking like it was made by preschoolers, then this is definitely the way to go.
And who doesn’t like bite size apple pie? Right! I think my husby consumed 6 in a matter of 5 minutes!
What you need:
1 package of pre-made Pie Crusts
(or click on picture for Pie Crust Recipe)
1 Can of Apple Filling
1 tbsp of Cinnamon or sugar crystals
1 tbsp of Butter

Now let’s begin:
1) Start with making your pie crusts.
If you are not a pie making person, then use the ready made pie crusts out of the dairy section of your local grocer.
Simplify! There is no shame in using a pre-made crust (:
My favorite recipe is The Pioneer Woman’s Pie Crust. If you don’t have a favorite recipe, then by all means try this one!

Click on picture for Pie Crust Recipe
Don’t you just love old pastry cutters? I do! I love cutting the butter into the flour! Makes me think of simplier times. Sigh
2) After you crust is complete and rolled, cut out 4 inch circles. I use a lid of a canister that I have because it is perfect size. Anything you have will work. Don’t panic if its not the exact size. I promise the pie will go on.
3) Use a cupcake/muffin pan and cut 3-4 inch long strips of parchment paper appx 1 inch wide. Enough for all slots in your pan.

The parchment paper will make it so much easier to lift pies out of pan after they have cooked.
4) Take your crust circles and place in cupcake holes. I try to make pleads in my crust as much as I can for a little extra character.
5) Fill your pie crusts will apple filling. I used can apples for these and used appx 2 apples and a little filling in each pie.
**Check back soon for my post on Homemade Apple Filling! (The Apples are just now ready to pick)
6) Save enough dough to cut out mini stars.
This star cutter was actually from a Christmas Mini Cookie Cutter Set I got for super cheap after the holidays! Hey works for me!
7) I then added a tiny bit of butter on top of the stars and sprinkled cinnamon. YUM!

If you will notice in the picture above, these are sprinkled with red sugar crystals. My husby thought some of the stars should be red! If it makes him happy, then yes I will add red sugar crystals to half of my pies!
8) Bake at 350 for appx 20 mins, checking your pies along the way.
I hope you enjoy making these as much as I do. And with the parchment paper as tabs, they should be really easy to lift out of the pan.

Can you really have a Holiday without Sugar Cookies? Are they not a staple of days gone by? I decided for this 4th of July I would make Freedom Sprinkle Sugar Cookies, which is your basic sugar cookies with festive sprinkles.
I love making sugar cookies, but what I love more is letting the kiddos decorate them! This has been a tradition in our house since the kids could walk. Don’t you just love traditions? No matter if it’s Easter, Christmas or the 4th, we need decorated sugar cookies!

For my sugar cookie recipe you will need:
2 cups of sugar (wouldn’t be sugar cookies without lots of sugar)
2 cups of All-Purpose Flour
1 cup of butter softened (2 sticks)
1 egg
1/2 tsp baking powder
1/4 tsp of salt (I love kosher salt)
1 1/2 tsp of vanilla or vanilla paste (I prefer paste, so much more flavor)
1/4 cup of flour for rolling

This is how I do it:
1) I start with a parchment paper covered cookie sheet.
I LOVE parchment paper.
I don’t know how I ever survived without it!
Doesn’t it make life so much simpler?
2) Then I cream together my butter and sugar until it is completely mixed, almost to a mixed stage.
3) Then I add in my egg and vanilla.
4) In a separate bowl, i slightly whisk together my flour, salt and baking powder.
5) I then add the dry ingredients to my sugar/butter/egg mixture.
6) Mix together well.
7) At this point you have 2 options. You can roll into balls and bake, or you can roll out like pie crusts appx 1/8 inch thick and cut out circles.
I normally roll out and cut into circles with a round cookie/fondant cutter. you can also use a biscuit cutter (:
If you go for this option, you will need to lay out a piece of parchment paper and use your remainder of flour so your dough does not stick.
8) Lay your circles or dough balls appx 3 inch apart on cookie sheet.
9) Bake at 350 for 8-10 or until they start to turn slightly brown around edges.
Don’t over bake, they are suppose to be chewy.
Yields appx 20 cookies.
10) After cookies cool then decorate with your favorite icing, sprinkles and sugar crystals.
Enjoy!
Now that the snacks are made, it’s time for a little decorating! I drive my husby crazy sometimes with all of my decorating for parties, events, holidays and just to make the house more cozy and appealing me me.

I wanted to do something very simple for the front porch. We have a super cute wrought iron table on one side and a white porch swing on the other, so just a little something festive was the key. I chose to decorate the table which sits in front of an old screen door. I covered the table in a blue star material and added a chalkboard, a rusted star planter, which i added a flag material to, and a patriotic plaid placemat for a center piece.
Nothing fancy but perfect!

I have several of these white wooden garden chairs. I have some inside and I leave some outside. I really enjoy sitting ferns and planters of flowers on the outside chairs. In this pic I am using the rusted planter with flag print material. Such a cute idea to sit beside your front steps or on the porch.
Sometimes all you need is subtle touches.

This idea is great for a small 4th of July get together or a morning brunch. I used my table from my porch, added a couple of my garden chairs and make a super cute place sitting with all of the festive food.
Now how easy is that. Took maybe 5 minutes.
I love having small get togethers and brunches. This set up is also great for a Tea Party.

And what kind of Holiday would it be without dressing festive?
My kiddos and I have done several different shirts in the past for the 4Th. This year we have been on a Tie-Dye kick so we decided 4th Tie-Dye Shirts would be perfect.
We have done several different dyeing in the past. We have used the regular tie-dye, we have used kool-aid, but I feel the Rit dye works the best for fading.
What we used:
White t-shirts (we chose v-necks for a different look this year)
package of rubber bands
Rit Dye in Cherry Red and Royal Blue
2 large bowls
Newspaper

How we made them:
1) First wrap rubberbands around your shirt
The awesome thing about tie-dye is that you really can’t mess it up. Every shirt has its own unique design.
I prefer to wad my shirt up and place rubberbands in random places (:

2) Add 1/3 bottle of dye to appx 2 gallons of hot water in a large bowl.
I use the same color bowl as dye so it won’t stain. And yes I use a little more dye, and less water than called for because I want my colors to pop!
3) Place newspapers on floor (or go outside) and set bowls of die on top.
4) Dip one section of your shirt in a color and hold for 3-4 minutes.

5) Gently wring out using a glove or plastic bag on hand and dip another section in same color or other color dye.
You can do half the shirt one color, the other half another color or sections in each color
6) When shirt is covered in dye, place in plastic bag and let leave for 12 hours so colors will set in.
7) After the 12 hours, remove shirt from bag and rinse with warm water as you start to remove rubberbands.
8) After all bands are removed, rinse shirt in cool water, until water is mostly clear.
9) Hang shirt up to dry part way and then continue drying in clothes dryer.
10) Remove shirt and you are ready to wear!

After all the drinks, desserts and shirts were made, we were ready for a great night of Food, Freedom and Festivities with friends.

We ate, and swam, and got ready for fireworks!

And after dark we enjoyed playing with a few sparklers.

Overall it was a another wonderful 4Th of July.
I hope you had am amazing day of Food, Freedom and Festivities in your neck of the woods!


Ten years ago, my husby and adopted a little, bright and cheery twelve year old girl. No one explained in depth what an emotional roller coaster life would be like for all of us. Sure you are given the ins and outs, but come on, this is life, real life. There is no script that can prepare you for the struggles of when past and present collide.
And Oh Boy, did they ever collide!
Fast forward ten years. Our daughter Gracie is getting ready to give birth to our second grandbaby on Thursday! Yes I did say grandbaby! My husband and I were both fairly young, married 5 years with two toddlers when we adopted. I knew there would come a time when I would be a “young” Mimi, but I’m not sure if I was really prepared for when it happened!
When I think about grandma’s, I think of little gray haired ladies with buns, sitting in the rocking chair. (:
Not sitting at a laptop blogging about my crazy life of cooking, homeschooling and TEENAGERS!
One good thing is, I am young enough to chase after those kiddos! And yes there is more than one.
Last year Gracie got remarried to a man who has two boys from a previous marriage. Gracie, has her daughter Lilli from a previous marriage for a total of 3 children. Now with Gracie getting ready to have Laila, there is a grand total of 4 children 6 and under. Wowzers!!
They were very limited on space for a baby room, but after finding an awesome “Closet Nursery” on the ever so wonderful Pinterest, everything started coming together.
The closet was painted pink, in with the crib, and up with a design on the wall. VOILA! Ready for baby Laila.

photo courtesy of my daughter Gracie
I really wanted to make something special to personalize the space, even if it was small. I found these adorable letters that came 2 in a pack from a local craft store and they are only appx 3 inches tall. PERFECT, for above the crib.

The theme is owls, but I wanted to incorporate other designs onto the letters, so I choose a variety of polka dots, chevron, stripes, and a cool old sheet music design. I even found a sheet that had all the designs I picked out on that one sheet, which tied the letters all together.

I pilled out my old Mod Podge and Glue Gun (for owls and birds), and got to work. I really like using a pencil to trace around the letters on the back of the paper. It makes it so much easier to cut out evenly.
After all my letters were cut out of paper, I Mod Podged them onto the wooden letters and added one extra coat of Mod Podge on top to seal them good.
After all the letters were complete, I added wooden owls and birds to some of the letters to tie the theme of the nursery in!
I am really excited how well they turned out. All together it was appx a 1 1/2 hr project. Not bad for a Crafternoon!

Did I happen to mention Baby Laila will be making her appearance today? Yes, you heard right! My daughter is being induced this morning so Laila should be here before tonight!
Even though I am so very excited, I am also very nervous. See, when Gracie was in labor with my grand daughter Lilli, She started having some issues with her blood pressure dropping which caused Lilli to go into distress. Very scary moment for me as a mom, watching your daughter have complications during Labor.
I’m asking for Prayers today for Gracie and Baby Laila, that everything will go smoothly!
And I would love to see any Mod Podge Projects you are working on!
Miranda
I love Good Deals!
I love thrifty finds and turning them into something amazing I can use. Whether its just for fun or decorating project for the house.
This past week I was in my local Dollar General Store, when I came across white ceramic candlesticks on clearance for $1.50! Well, I don’t know about you but that was too good of a deal to pass up. My mind instantly started turning thinking of something I could make out of a candlestick.

Now don’t get me wrong, I could have just used it the way it was but it really didn’t match any decor in my home right now. Then I thought, if I attach a plate on the top I could turn it into a Cake Plate. BINGO!
I love cake plates, but gosh they are so expensive!
So I paid for my candlestick and headed home. Later in the week I drove to a nearby town to a Dollar Tree and picked up a white cermanic plate for $1. And then I was ready to craft!

I went home, pulled out my trusty glue gun/sticks and my E6000 glue, which by the way if you havent used to AWESOME, and started my project.

There is just something about a quiet “Crafternoon”, using my creativity and just relaxing. Sometimes when I’m by myself it’s a little too quiet, so I have to turn on my “Crafternoon” Playlist, which is my favorite music while working.
This playlist I call “ThriftedGrace”. I hope you guys will check it out!
Anyway, back to my cake plate. It’s so simple. Really guys, like 3 steps and your done! A 10 minute project which would be great decor for a party, or celebration such as a Baby or Bridal Shower or a Wedding. Mine I think will look just right on my kitchen island with a nice chocolate cake sitting on it! HAHA!
Items you need:
Candlestick
Plate
Glue Gun/Glue Sticks
E6000
1) Squirt E6000 around the edges and on top of Candlestick
2) Add hot glue to underside of plate
3) Even up and press the plate firmly on top of Candlestick
4) Bake a cake and enjoy your creation!


That’s all it is. $2.50 Project!
The E6000 works so well, the only thing I use the hotglue for is to set it in place til the E6000 settles good!
I was also looking around at the Dollar Tree and found short glass candlesticks and clear dessert plates that would make a really cute cupcake platter (for 1) or to serve a few cookies or tea sandwiches on. So many possiblilites. I don’t know if I will ever buy a “real” Cake Plate again!
So then I got to thinking……I know other bloggers/crafters have thought of this before, so i decided to find some! And what I found amazed me! I decided to share a few of my favorites with you!
http://www.pinterest.com/pin/222435669066839074/ (Must try this one one)
http://www.pinterest.com/pin/222435669066789968/ (To serve candy! Love it!)
http://wanderingchopsticks.blogspot.com/2010/08/how-to-make-homemade-cake-stand.html (would be beautiful for a wedding)
Hope you enjoyed my DIY Tutorial on Cake Plates!
Sweet, Sweet Summertime.
Fireflies at night, Daylight til 9 o’clock, Sippin Lemonade from a Mason Jar. Oh Yes! I love Summertime! There is just something about sittin in the porch swing, smelling BBQ from the grill, and pickin fresh veggies from the garden.
Well, maybe not so much the last one! Now I love to reap the benefits from the garden, don’t get me wrong, but after spending hours in the hot sun, bent over pickin blueberries you start to wonder if grocery store veggies are so bad after all LOL!!!
But I know that when Fall comes around and I am having fresh Blueberry Cobbler for Thanksgiving, or when Winter sets in and I’m sitting around the fireplace with friends drinking fresh Blueberry Wine, I will be ever so thankful that I spent hours in the garden gathering up the blueberries. Hey, at least I’m getting a nice tan with the deal!
This week has been blueberry madness. From Blueberry Syrup, to Blueberry Topping and Blueberry Butter, I am going Blueberry Mad! Heck, i’m good just sitting down with a bowl of blueberries and fesh cream…YUMMM!


Today, I wanted to share with you my version of Blueberry Syrup…
I start with 7 cups of fresh blueberries (washed)
2 1/2 cups of sugar ( i like it sweet)
1 tsp of molasses
2 1/2 tbs of lemon juice
1) Place blueberries and water in a large pot. Using a masher (i use my potato masher) crush the berries.
2) On medium heat, bring to a boil and then simmer on low for appx 15-20 minutes as they darken in color.
3) Remove from heat and strain berries, mashing as you go to extract as much juice as possible.
4) Add blueberry juice and sugar and molasses to pot, return to a boil and simmer on low for appx 12- 15 minutes. (juice will slightly thicken)
5) Add the lemon juice and return to boil for about 2 more minutes, stirring as you go.
6) Poor into a quart size Mason. Your syrup is ready to enjoy!

**Use right away or store in fridge for appx 2 weeks
**If your syrup is not as sweet as us southerners like it, add 1/2 more sugar to the recipe!
Now your probably thinking what do I do with all this mashed blueberries?
Good question! You can 1) throw away (but please don’t) or 2) add about 1/2-1 cup of sugar and 1 tbs of lemon juice to the mashed blueberries, simmer on low for 5 minutes or untl the sugar is disolved and enjoy on top on pancakes or on a big bowl of icecream! But on Part 2 I will be sharing another way to use the mashed blueberries. So many choices!

I hope you enjoy this recipe! And come back soon for Part 2 of “I Found My Thrill On Blueberry Hill”!
With Love Miranda
Wow, what a busy week full of celebrations and activities this has been. Now don’t get me wrong, I love celebrating, I love parties, but there was just a few too many in one week for me!
But I didn’t want to leave out any special occasions from my blog so I decided to do a picture collage of all the events I did not to get to share throughout the week!

We started last Friday morning with my Grandson Wyatt’s Kindergarden Graduation.(yes grandson, no judgement please) (Top left and middle picture) It was so adorable all of the children getting to walk across the stage in their little gown and cap!
That night we celebrated my son Keegan’s 15th Birthday with family and friends. I will share a full blog post of that later!
Saturday arrived and we spent the day celebrating my great-nephew’s 1st Birthday with a full FIESTA! His daddy is full hispanic and his family was gracious enough to host us all for a day of fun and AWESOME FOOD! (Top right picture, Middle left picture) I seriously felt I was in back in Guatemala, (sigh) it was wonderful!
Our church is starting a new series in our Children’s Department, so my sweet husby and I spent one evening this week decorating for “Clubhouse Pirate Adventure”. Argggg! Ahoy Matey! (middle center and middle right pictures) We always have a great time coming up with the vision and putting it into place! And to see the smiles on all the kiddo’s faces this weekend was PRICELESS!
After all of that celebrating and decorating, we slowed it down for a Date Night! (Bottom left picture) We had a bit of celebrating to do ourselves. I had just received notice that day, that i was selected to be a part of Author ReaAnne Thayne’s Street Team for her upcoming new release “Wild Iris Ridge”. I was beyond excited!
We decided on a quiet evening at a local Coffee Shop where we had some yummy drinks and treats. We ended the night at the bookstore which is one of my FAVORITE places! He is so good to me!
Yesterday, we wrapped the week up with my granddaughter Lilli’s 3rd Birthday! (Bottom center and bottom right pictures) Look how sweet she is blowing out her candle. (: And yes that is my VERY pregnant daughter beside sweet Lilli. She is due in 7 weeks! Lilli had a pool party and BBQ for her birthday and being the cool Mimi that I am, I made her a Bubble Guppie cake!
I was so shocked to see her jump off that diving board! WOW!
For once I can honestly say I am so glad tomorrow is Monday and a new week! I think its time for a slow-down!
I also wanted to share the Awesome Blogs I linked up with this weekend:
http://www.sweetbellaroos.com
http://easylifemealandpartyplanning.blogspot.com
http://memoriesbythemile.com
http://www.flamingotoes.com
http://www.cookinforthesevendwarfs.com/
Drop by and check them out!
And “In Case You Missed It”, make sure to check out my blog posts from this past week!
http://graceandgravy.com/2014/05/25/sometimes-we-just-need-a-do-over/
http://graceandgravy.com/2014/05/28/freedom-at-its-finest-and-potato-salad-too/
http://graceandgravy.com/2014/05/28/a-little-taste-of-mexico-and-the-truth-about-link-parties/
http://graceandgravy.com/2014/05/30/diy-homemade-powder-laundry-soap/
Have an AWESOME Monday!
